目次
Chrome90にて追加された機能
Google Chrome 90が 2020年4月14日に公開されました。
そこでいろんな機能が追加されていたのでまとめてみました。
CSS flexbox
chrome90ではchromeのdevtoolにてcssのflexboxの設定を直感的に操作することが可能になりました。
flexboxの枠組みの表示
display: flexが指定されている要素の横にflexボタンが表示される様になりました。
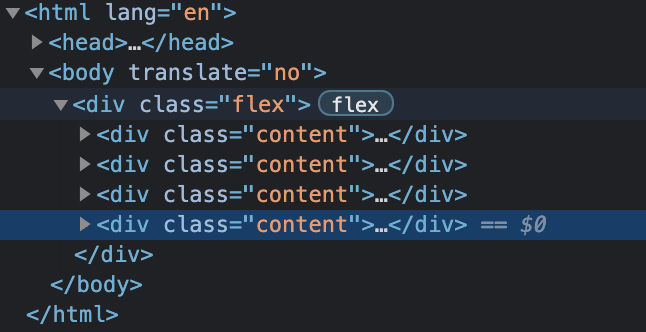
こちらをクリックすると画面上のdisplay: flexが当たっている要素に関して枠組みが表示される様になります。

これでどの様に要素が配置されているのか分かりやすくなります。
配置に関して直感的に設定する
devtoolのstylesのタブにて、display: flexの横にボタンが配置される様になりました。

ここをクリックすると、どの様に配置するかの選択を行える様になります。
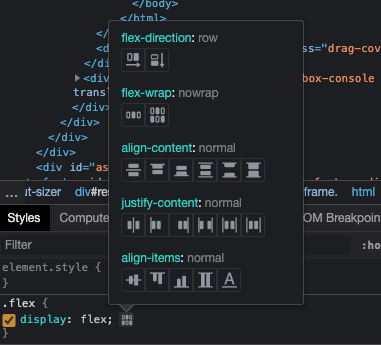
動きに関しては動画の方が分かりやすいと思うので動画を添付しました。
Core Web Vitalsの表示
Core Web Vitalsとは読み込み時間(LCP)インタラクティブ性(FID)ページ・コンテンツの視覚的安定性(CLS)などのUX指標のことです。
参考: https://developers-jp.googleblog.com/2020/05/web-vitals.html
このCore Web Vitalsを画面上に表示することができる様になりました。
まず、devtoolの右上の3点のメニューをクリックしてRun commandをクリックします。
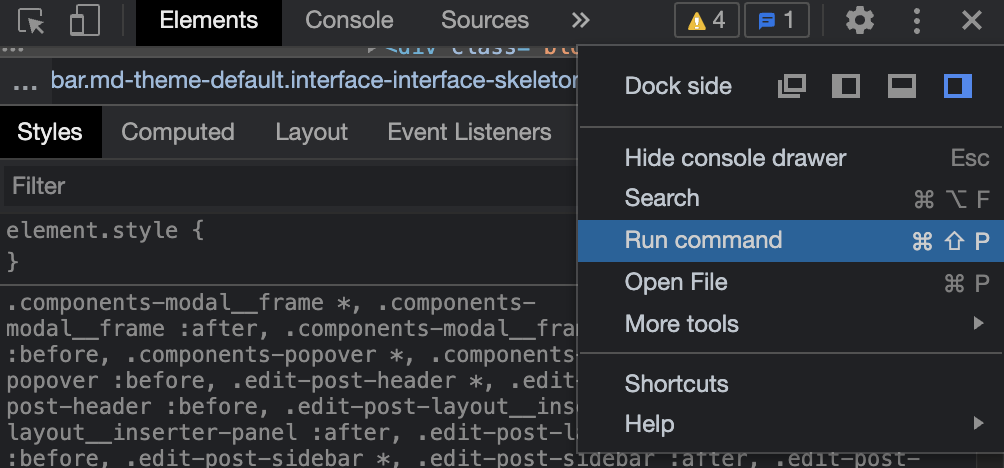
そして show renderingを検索し、クリックします。

そうするとRenderingのメニューが表示されるのでそこからCore Web Vitalsにチェックします。
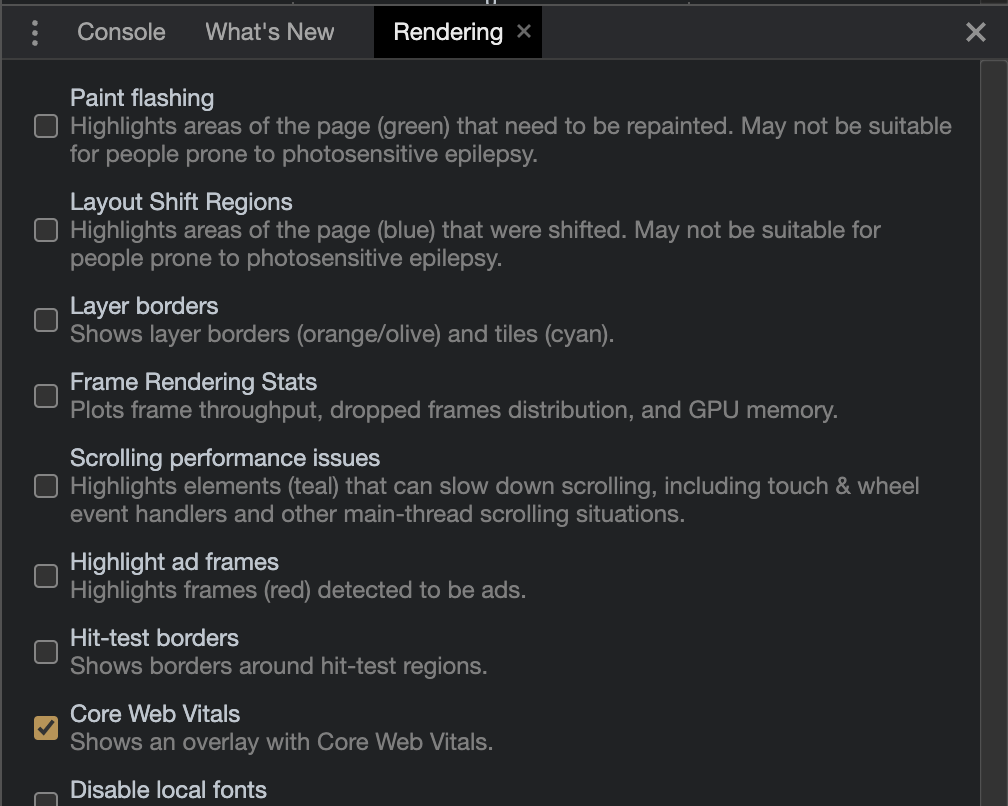
そうすると画面右上に読み込み時間(LCP)インタラクティブ性(FID)ページ・コンテンツの視覚的安定性(CLS)の値が表示されます。

Color Palettes
cssの設定をdevtoolから変更する際にColor Palettesから色を選択することが出来ます。
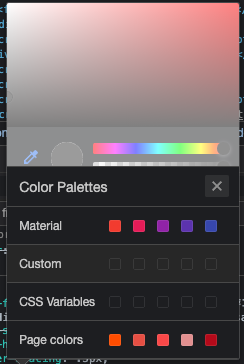
カラーコードの左横にある色が表示されている部分をクリックすると色の選択が表示され、したにColor Palettesが表示されるのでそこから色を選択することが出来ます。
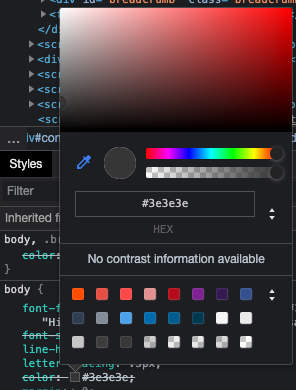
まだ、右側にあるソートのアイコンの様なものをクリックすればMaterial ColorやPage Colorの選択肢が表示されます。
ApplicationタブでTrust Tokenを確認
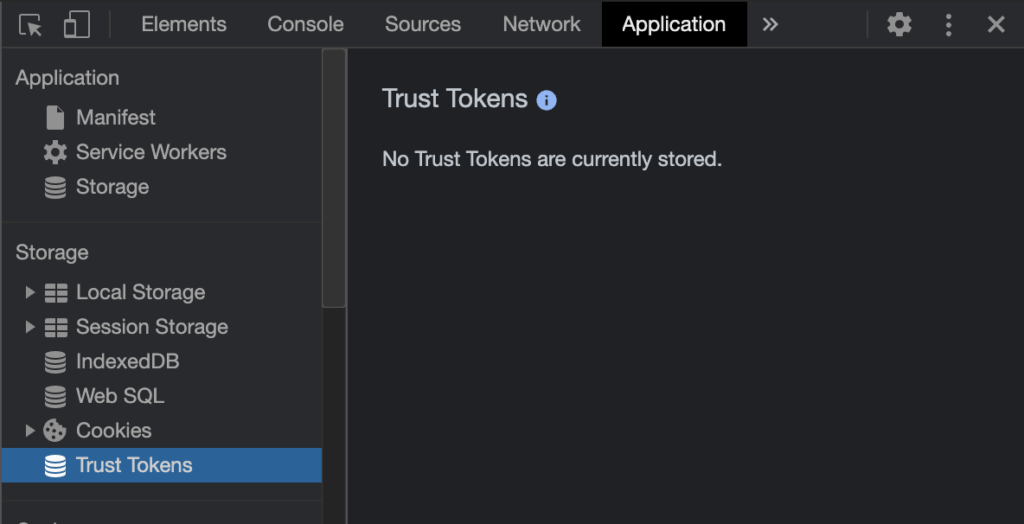
Trust TokenはBotからの攻撃への対策として使用されるものの様です。
Trust Token is a new API to help combat fraud and distinguish bots from real humans, without passive tracking.
https://developer.chrome.com/blog/new-in-devtools-90/
このTrust TokenがApplicationタブで確認できる様になりました。
color gamutの設定をブラウザで行う
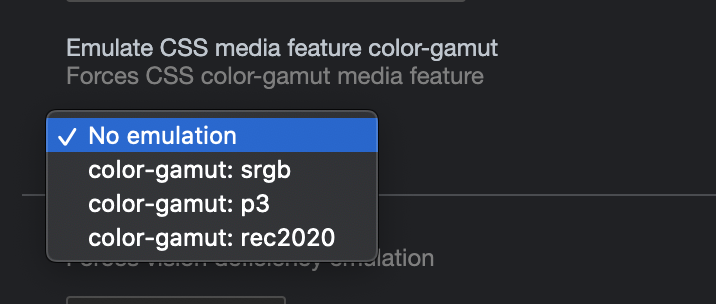
color-gamut は、ユーザーエージェントや出力機器が対応している色のおよその範囲を調べるために使用するものです。
このcolor-gamutで設定し、どの様に動作するか確認することができる様になりました。
まずRenderingのタブを開く必要があるので、devtoolの右上の3点のメニューをクリックしてRun commandをクリックし、show renderingを検索しクリックします。

Renderingタブ内のEmulate CSS media feature color-gamutの部分でセレクトで選択することが可能です。
DOM TreeとAccessibility Treeを変更するボタンが表示される様になった
Accessibility TreeとDOM Treeを簡単に変更することができる様になりました。
まず、DOM Treeの表示ができる様にする必要があるので、まず左上の歯車のアイコンをクリックして設定パネルを表示します。

そしたら次にExperimentsタブのEnable full accessibility tree view in Elements paneにチェックをつけます。
そうするとElementsのタブの中にトグルするためのボタンが表示されるのでここをクリックすることで表示を変えることが出来ます。


その他の変更点
Chrome90にて追加された機能で紹介したもの以外でも色々変更点があった様なのでそこに関しても軽くまとめてみました。
ダブルクオーテーションがエスケープされる様に
consoleにてダブルクオーテーションがエスケープされる様になりました。

パフォーマンスの向上
devtool使用ときのpageの読み込みのスピードが向上した様です。
fn.displayNameがfn.nameに変更
今までは
function example() { debugger }
example.displayName = 'example function'
と設定していたのが対応しなくなり、
function example() { debugger }
example.name = 'example function'
の様に設定する様に変更されました。


コメントを残す